Rapid Check In Out Operation Labels
To perform a Rapid Check In or a Rapid Check Out, operation labels are used; they are scanned into the Scan Here field at the Rapid Check In/Out page with a wedge scanner.
The Rapid Check In/Out Operation Labels are:
- Cancel: cancels the Rapid Check In/Out operation.
- Check In: enables a Rapid Check In operation.
- Check Out: enables a Rapid Check Out operation.
- Save: saves the Check In or Check Out.
- Save and Print: saves the Check In or Check Out and loads a Check In Confirmation or Check Out Confirmation onscreen.
Printing the Check In/Out Operation Labels
The Rapid Check In/Out Operation Labels may be printed from the View Reports page or from the View Labels page.
View Labels Page
To print the Rapid Check In/Out Operation Labels from the View Labels page, refer to the instructions that follow.
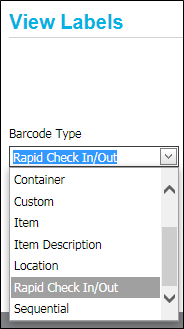
- Select Reports > View/Print Bar Code Labels. The View Labels page appears.

- At the View Labels page, click the arrow in the Barcode Type field and select Rapid Check In/Out from the selections that appear.
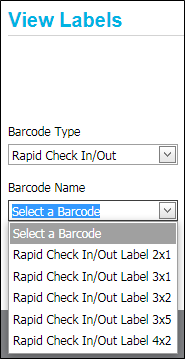
- Next, click the arrow in the Barcode Name field and select the Rapid Check In/Out label size from the options that appear. (The label will be printed to the corresponding label size.)
- The Rapid Check In/Out labels appear in the onscreen preview area to the right. They are ready to be printed to the label printer.
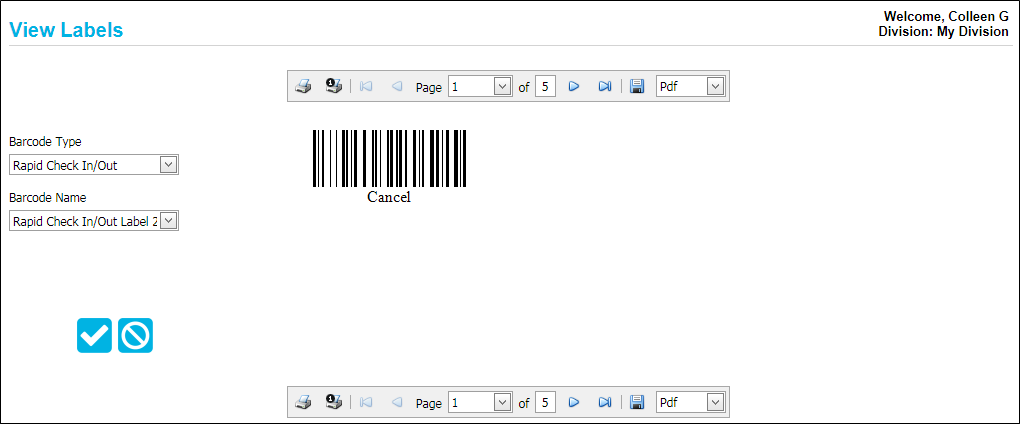
- The Rapid Check In/Out labels include:
- Cancel: cancels the rapid check in or the rapid check out. Any assets that have been checked in or checked out during the rapid check in or check out process just performed will be discarded when the Cancel barcode is scanned.
- CheckIn: designates a rapid check-in process.
- CheckOut: designates a rapid check-out process.
- Save: saves the rapid check in or the rapid check out. All assets will be processed as checked in or checked out when the Save barcode is scanned.
- Save and Print: saves the rapid check in or the rapid check out and loads a Check In Confirmation or a Check Out Confirmation onscreen.
View Reports Page
The Rapid Check In/Out Operation Labels may also be printed from the View Reports page in the form of a Rapid Check In/Check Out Operations Report. This report contains all of the Rapid Check In/Check Out Operation Labels, which are contained on one 8.5" x 11" sheet of paper.
To use the Rapid Check-In/Check-Out Operations Report for the Rapid Check In/Out Operations, refer to the steps that follow.
- Select Reports > View/Print Reports from the navigation pane.
- In the Report Type field, click the drop-down arrow and select the Rapid Check In/Out option from the list that appears.
- In the Report Name field, select Rapid CIO Operations from the list that appears.
- The Rapid Check-In/Check-Out Operations Report loads onscreen.

- To print the report to your default printer, select the Print icon in the Report Toolbar.
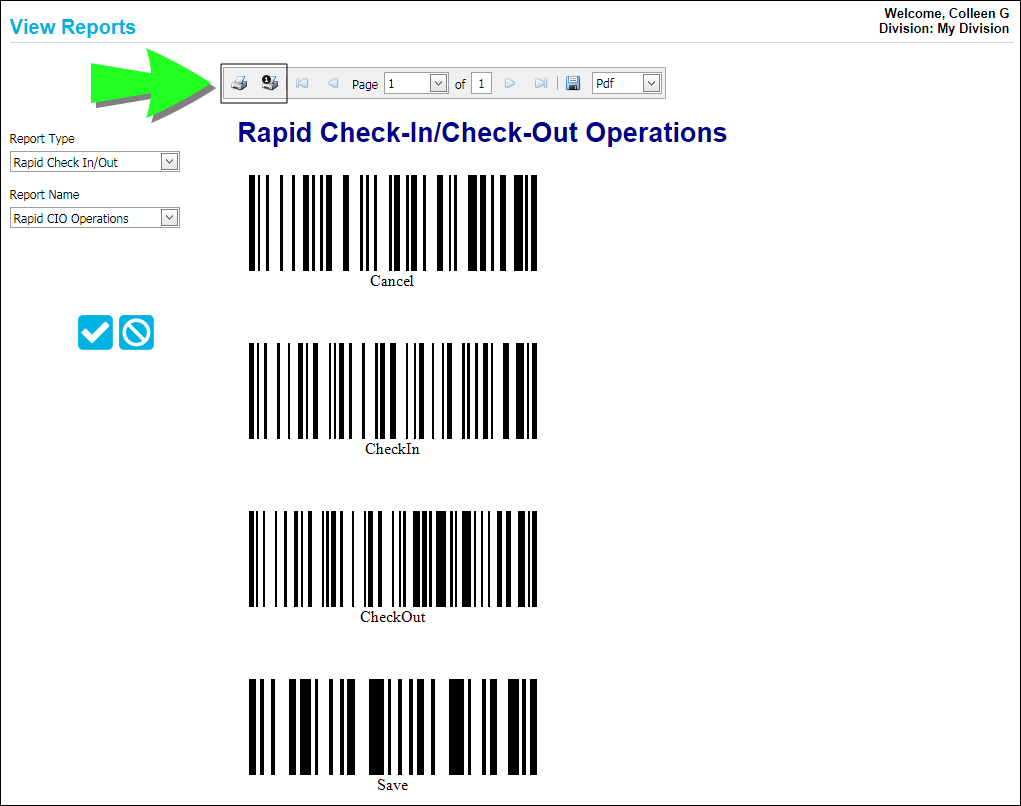
- A Print dialog appears. Click OK to send the Report to the Printer.
- The report is printed; all of the Rapid Check In/Out operation labels are printed on one sheet of paper.